3 VM - Ping Connection
Youtube
In this project, we will install 3 virtual machines to communicate with each other. We already installed the Kali machine so we just need to install the other 2.
If you missed the installation of Kali, follow this blog.
https://toukeevang.blogspot.com/2023/10/virtual-machine-set-up.html
Installation
Windows and Cloning the Kali machine.
Windows
Ensure you have the minimum hardware requirement before starting or the lab will utilize many of your hardware resources.
Go to the Windows website, download the Windows Server 2012 R2, and follow the instructions.
https://www.microsoft.com/en-us/evalcenter/download-windows-server-2012-r2

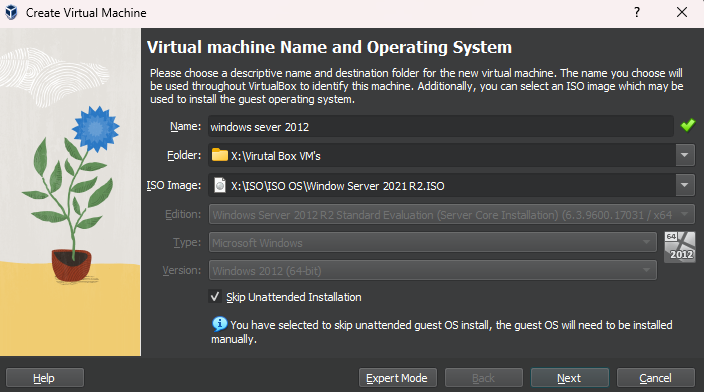
Once you have downloaded the ISO open VirtualBox and click “New”

Give your virtual machine a name and search for the ISO Image where you download the file.
Name
Folder - ( Location where you want to store your virtual machines )
ISO Image - ( Where you download the file )
CHECK ( “ Skip Unattended Installation “ )
Next
Change your setting for your:
CPU
RAM
Storage
Next
The setting should be minimum specification or higher. Again here are the minimum requirements.
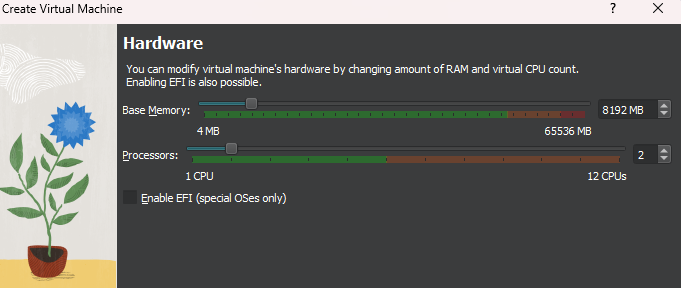

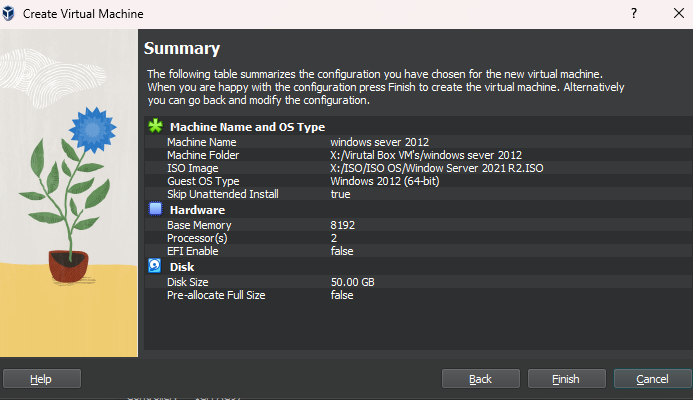
Once you have configured your settings, verify these settings are correct and can support the operating system.
Finish
Launch your Windows Server 2012 virtual machine and follow the steps to complete installation.
Kail
To make a clone virtual machine, right-click on the already installed Kali virtual machine and choose “ Clone “.

You will be prompted to:
Rename your virtual machine
Choose a virtual machine stored location
MAC Address Policy: Choose “ Generate new MAC address for all network adapters “
***** IMPORTANT *****
The reason to generate a new MAC is to ensure you do not have the same MAC as the original Kali.
Next
Full clone
Current machine state
Finish


Network Adapter Setup
At the top of VirtualBox under file, you will see a section called “ Tools “
Click Tools
On the right is the setting with three lines
Click and choose “ Network “

Under “ Nat Networks “
Create “ Green + sign “
Name the new network “ NatNetwork “
General Options
Name
IPv4 “ Leave Default ip address “
CHECK “ Enable DHCP “
Apply
Now you have configured a separate network in NAT for any virtual machine using these adapters.
Changing Network Adaptor for the Virtual Machines
Choose your main Kali virtual machine and click settings.

Click “ Setting “
Left side “ Network “
Adaptor 1
Attached to: NAT Network
Name: NatNetwork
OK
Do the same for the clone virtual machine and the Windows Server.


Ping to make communication
You can start from any virtual machine you see fit but we have to get the IP address of each host device so we can communicate using the ping command.
On your clone virtual machine open the terminal and type the following command.
> ip a
This command gathers the network device's information to output it to the terminal. Most important is getting the IP address to use with the ping command.
Clone IP address: 10.0.2.20, your IP address will be different.

Follow the same steps for your main Kali machine. IP address 10.0.2.25, your IP address will be different.

Windows
Also the same process but we will search for the command prompt “cmd“.
On your Windows machine bottom left “ Start “
Search for “ cmd “
Open cmd and type
ipconfig
Get the IP address ‘ IPv4 “ 10.0.2.15, your IP address will be different.
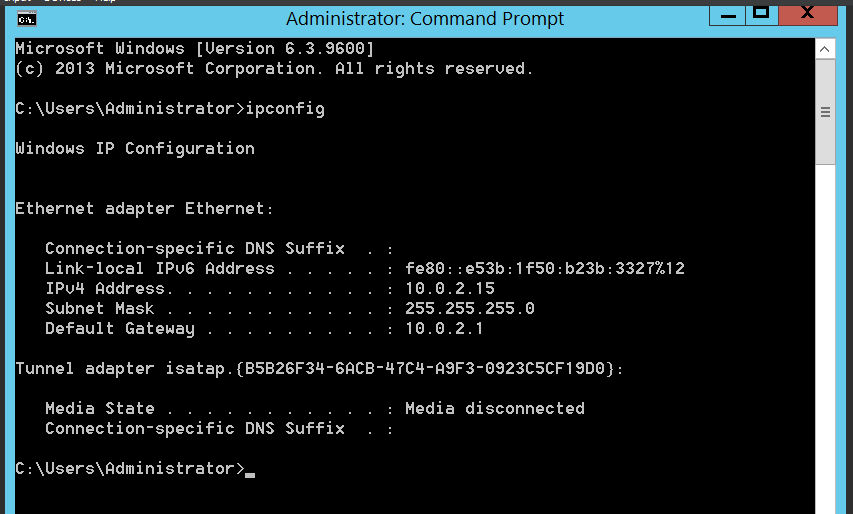
Your IP address will be different.
Kali: 10.0.2.25
Clone Kali: 10.0.2.20
Windows server: 10.0.2.15
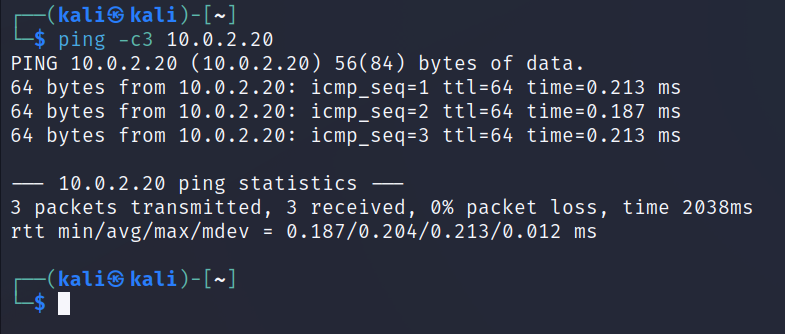
From the Kali virtual machine try to ping the clone machine.
> ping -c3 10.0.2.20
ping = the command to send ICMP packets to another node
-c { 3 } = count of ICMP packets sent to another host. You can change how many packets are sent over before stopping. If you do not, in any Linux distro the ping continues to send an ICMP packet until you cancel the command using “ control + c “
x.x.x.x = This will be the IP address of the node
Ping clone machine to Kali.

Ping Windows Server Machine to Kali and Clone.
In the command prompt enter the command
ping { x.x.x.x }
No need to use { -c3 } option as Windows stops after 3 pings

With Kali machine ping Windows computer. As you can see the Kali machine did not receive any acknowledged packets because by default Windows turned off the ICMP echo request.

To turn on ICMP echo request on Windows. Go to start and follow directions.
Start
Search
Firewall and Advance Security
Inbound Rules
File and Printer Sharing (Echo Request - ICMPv4-In)
Right click
Enable Rule


Now on any Kali machine, try to ping the Windows Server again and you should be able to communicate using the ping command.

Awesome job getting this far. Next, we are going to learn how to use Nmap to scan nodes in the network and learn options within the Nmap tool.
Reference:
https://www.microsoft.com/en-us/evalcenter/download-windows-server-2012-r2
Comments
Post a Comment