Kali Installation
Youtube
In this blog, we are going how to install Kali on to virtual box. The first step is to go to the Kali website and download the ISO for installation.
https://www.kali.org/get-kali/#kali-virtual-machines
Once you have downloaded the ISO, make sure you have a tool to unzip the compressed file. You down download 7-zip for free.
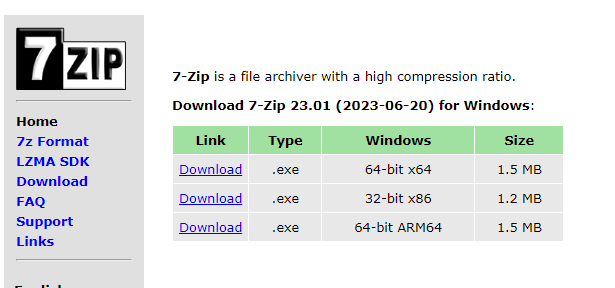
Download the version for your operating system and install 7-zip. Once you have finished installing 7-zip you will be able to unzip the compressed file. Find the file you downloaded from Kali and right-click choose more option if you do not see 7-zip.

You can choose where you would like your extracted file to be stored. In this case, I choose to extract the file in this location.
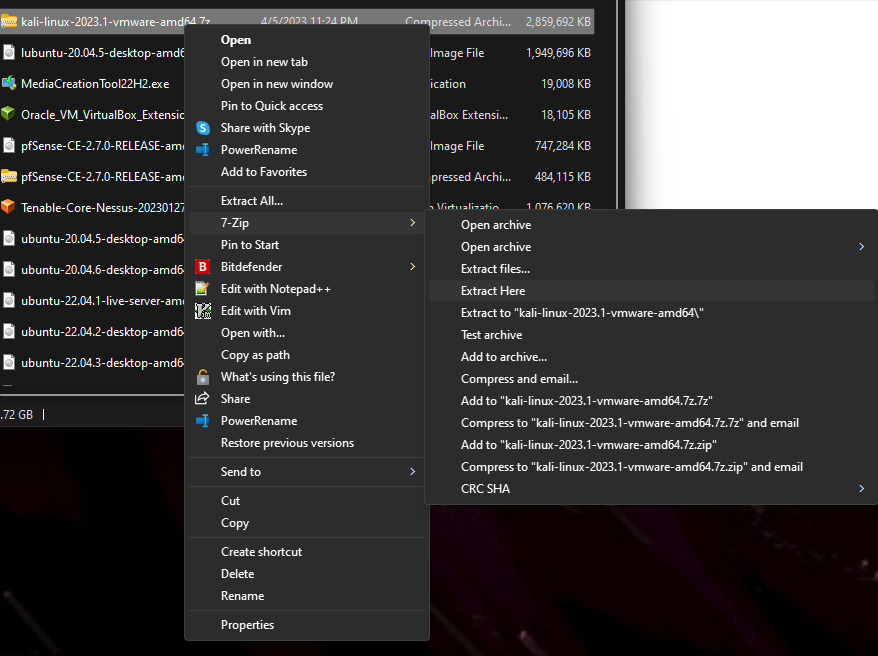
Once you extract the compressed file you will see another file called kali-linux-XXX.Xvirtualbox-amd.ova
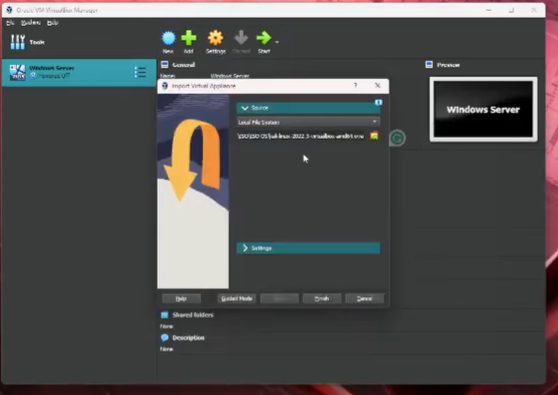
Double-click on that file and it will import the Kali operating system into the virtual box.
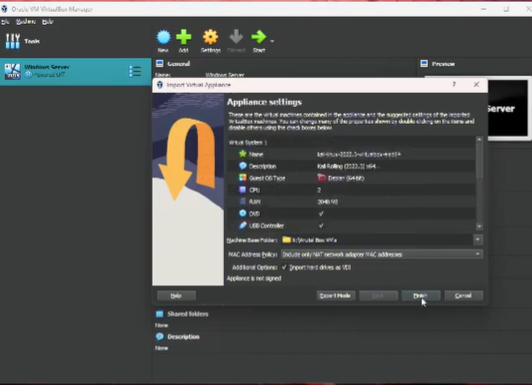
Choose the RAM and CPU settings you would like and install the operating system.
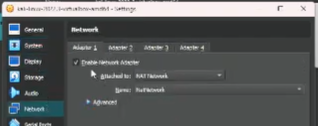
Once you have imported your operating system. Make one final change to the network setting“ NAT NETWORK”.

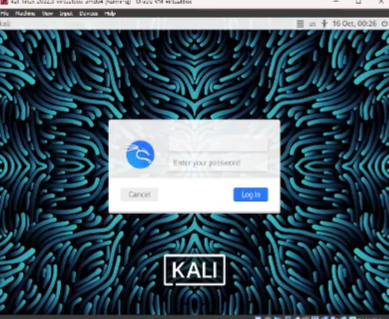
Launch your Kali machine and log in.
Default
user: kali
Password: kali

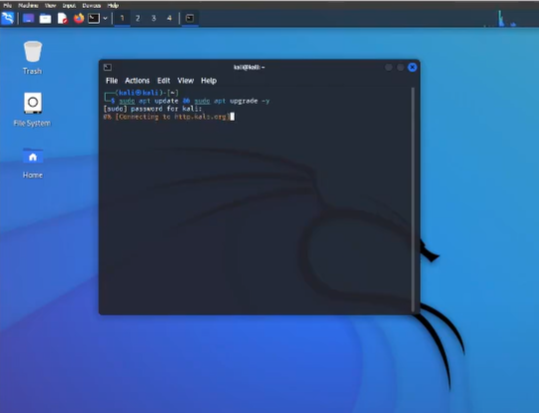
Once you are logged in, make sure to run in the terminal an update.
> sudo apt update && sudo apt upgrade -y
This completes the installation of Kali Linux.
Comments
Post a Comment