
Nmap Scan

 Nmap scan


Youtube


If you missed the first part of setting up the virtual machines and ping, do this part first before attempting to scan the devices on the network.


https://toukeevang.blogspot.com/2023/10/3-vm-ping-connection-in-this-project-we.html


We first going to start with an ARP scan to get the device's IP address.


On your Kali virtual machine, open the terminal and type the following command.


> nmap -PR -sn 10.0.2.0/24


  1. nmap = is the tool we are using followed by some options within the tool.

  2. -PR = P is for ping, R is for randomize 

  3. -sn = ping scan no port

  4. x.x.x.x = your target IP address


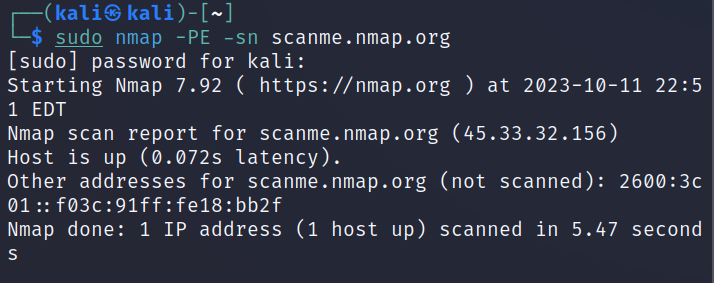
This next scan is to test websites and get the known IP address for the website. For this scan, you need to use the escalated privilege “ sudo “. 

> sudo nmap -PE -sn scanme.nmap.org


  1. sudo = escalated privilege

  2. nmap = tool use

  3. -PE = sends ICMP packet only to get responses back

  4. -sn = ping scan no ports

  5. Scanme.nmap.org = target


We are going to copy the IP addresses of the virtual machines and save them to a document or text file. Once you have saved the IP in the text document we can continue. This way you will not have to type the IP address on each command but to input the text.


In the terminal type:


> vim iplist2.txt

> i = to insert text

Copy and paste the 3 IP addresses into the text.

> : = options to save

> wq = write and quit text document


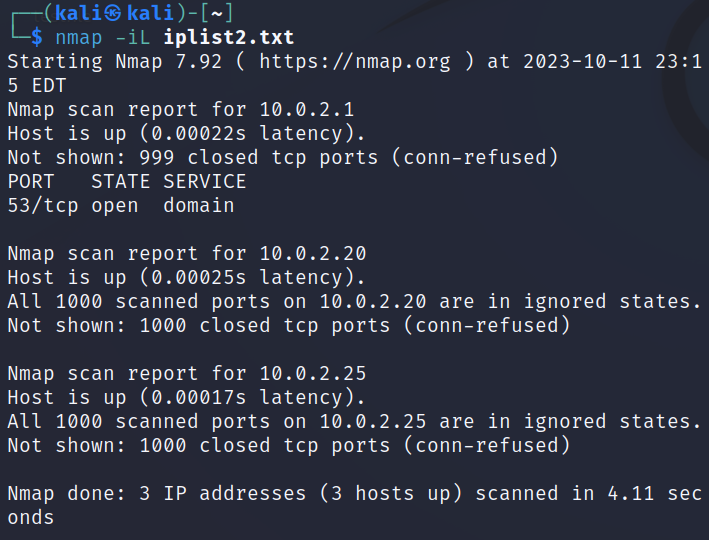
You already have the IP address of the 3 machines. It’s time to run a scan and look for any open ports.


> nmap -iL iplist2.txt


  1. nmap = tool

  2. -iL = insert a text document


Run this command to scan the specific IP in the list and look for any open ports.


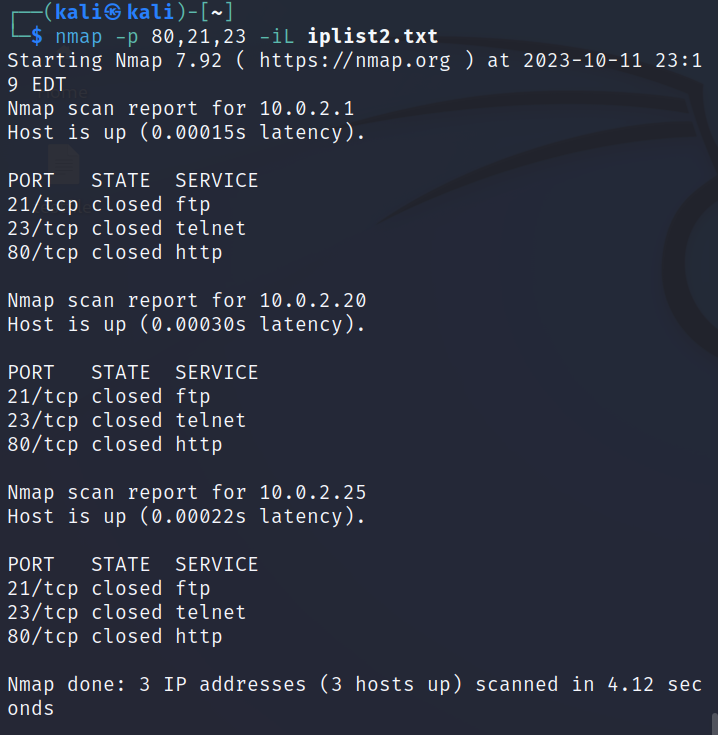
You can also specify which ports you want to scan by using 

“ -p { port number } “ and -iL to insert list. The image below specifies ports 80, 21, and 23.


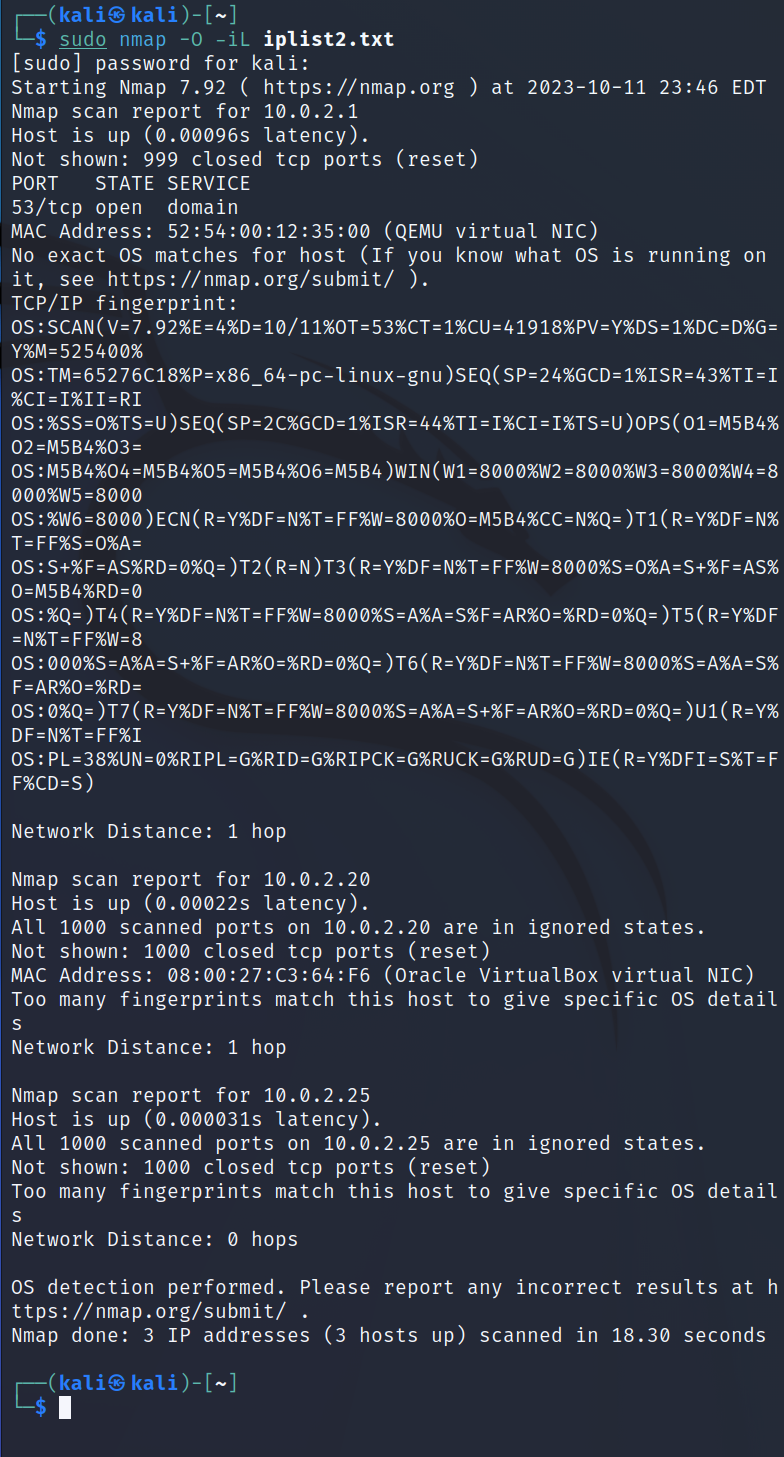
To check the version of the operating system use “ -O “


Sometimes you may want to perform a slower scan to not get detected, use

“ -T { 1-5 } “ 3 is default,1 is slow, 5 is fast.


Nmap also allows you to use a decoy IP address when scanning. Use 

-D RND:{ how many IP }


This will only show up if you have logs or wireshark open when running.


Nmap allows a randomized order of scanning ports. 


> nmap -iL iplist.txt –randomize-hosts


Nmap also allows spoofing of your MAC address using the  

“- - spoof-mac 0”


As you can see nmap sent a different MAC vs your MAC id using ip a


Nmap also has scripts that you can run to test different vulnerabilities your virtual machine may have. The location on Kali: /usr/share/nmap/scripts

To run scripts check the image below.


This completes the basics of Nmap scans. Hopefully, you have tested and learned something from these basic Nmap techniques. 

Reference:

https://nmap.org/


https://manage.accuwebhosting.com/knowledgebase/2609/How-to-Allow-Pingor-ICMP-Echo-Request-in-Windows-Firewall.html


http://scanme.nmap.org/


https://nmap.org/book/toc.html


https://nmap.org/nsedoc/scripts/


https://www.youtube.com/watch?v=wlqUO09J-nw 


Comments

Popular posts from this blog

Linux Server Installation

Linux Server Installation Youtube In the lab, we are going to install a Linux Server on a virtual box. Go to the Linux site and download the ISO for installation. https://ubuntu.com/download/server Once you have downloaded the ISO, go to the virtual box and start a new virtual machine. Name your machine and choose the ISO you downloading for installation. Choose your RAM and CPU settings. Change your network to “ NAT NETWORK”. Launch your new machine and follow the installation. Choose the first option. Install Ubuntu Server. Once you finish installation it will restart. Make sure to remove the ISO disk so you do not go through the installation process again. You will be prompted to log in with the username and password you created during the installation.  This completes the Linux Server installation.  

Virtual Machine Set-up

  Virtual Machine Set-Up with Kali Linux To start working in a test environment, we will need to set up a virtual machine. This requires some minimum specification of hardware to run this virtual machine. Please reference the virtual box for more information.  https://www.virtualbox.org/wiki/End-user_documentation   Once you have the minimum hardware requirements we can move on to the next steps. Virtual Box installation Kali installation Virtual Box Installation: In the browser go to https://www.virtualbox.org/ to download the file for your operation system. If you have Windows, download the Windows hosts, and if you have macOS download macOS. You can install the application once you have the file downloaded to your host system.  Run the VirtualBox installer and follow the default installation Once installing is complete you can search for the application in your system and open the application. Once VirtualBox is open it should look something like this. Downloadin...

3 VM - Ping Connection

  3 VM - Ping Connection Youtube In this project, we will install 3 virtual machines to communicate with each other. We already installed the Kali machine so we just need to install the other 2.  If you missed the installation of Kali, follow this blog.  https://toukeevang.blogspot.com/2023/10/virtual-machine-set-up.html   Installation Windows and Cloning the Kali machine.  Windows Ensure you have the minimum hardware requirement before starting or the lab will utilize many of your hardware resources. https://learn.microsoft.com/en-us/previous-versions/windows/it-pro/windows-server-2012-r2-and-2012/dn303418(v=ws.11)   Go to the Windows website, download the Windows Server 2012 R2, and follow the instructions. https://www.microsoft.com/en-us/evalcenter/download-windows-server-2012-r2   Once you have downloaded the ISO open VirtualBox and click “New” Give your virtual machine a name and search for the ISO Image where you download the file. Name Folder - ...